
 The excitement around new studio gadgets and equipment is seemingly inevitable. From that awesome set of headphones you’ve always wanted, to those high-end monitors you’ve been eyeing forever… It’s so easy to forget that all this stuff needs to somehow plug into something in order to work, right? Well, the audio cabling for your home music studio is one of those less than thrilling aspects in need of your careful attention.
In this article, we’ll break down the main categories of audio cabling for your home music studio. It isn’t always simply a matter of plug and play, as reasonable planning needs to go into it. This guide aims to simplify matters by helping you understand the variances, and how to set up.
Simplifying the Process: Audio Cabling for Your Home Music Studio
The more professional you aim to make your studio, the more complex it can seem in terms of wiring. Luckily, once you have your audio cable arrangement set up, you’ll never have to revisit the matter anymore… Assuming most of us don’t prefer fiddling around with cables, of course.
There are a number of variances between the types of cables you may use for your studio. Here we break down the various cabling options into two main categories. Namely, these are Digital and Analogue cables. We’ll then break these down further into subcategories for your better understanding.

We look at:
- Digital Cables
- MIDI
- Optical
- Interface
- Ethernet
- Analog Cables
- Unbalanced/Balanced Transmission
- Audio signal levels
- TRS/TS/XLR
Digital vs Analog Studio Cables
So what audio cables do you need for a home music studio? The two main categories of cables you get are digital and analog cables. The main differences between the two are particularly in how they transfer information between sources. To put it briefly:
What are Digital Signals?
Digital cables transfer information through binary code. In particular, this is a stream of 1’s and 0’s, a digital language interpreted by computers. Digital signals can be altered in thousands of ways that can also be undone and redone.
What are Analog Signals?
Analog cables, on the other hand, transfer information, primarily through an electrical current. As a result, analog cables are not as dynamic as digital cables.
Now that we understand the key differences between the two, we’re going to take a look at the various kinds of these types of cables. For the ideal audio cabling for your home music studio, we’re specifically looking at options more commonly used in home studios. This is as opposed to elaborate professional recording studios.
About Digital Cables
 In all likelihood, we’ve all used some form of digital cable at some point, if not daily. Digital cables are really simple to utilize and typically just work as required when plugged in. No hassles. Although there are multiple forms of digital cables, they are all similar in that they use binary code to transfer information.
1. MIDI Cable
MIDI (Musical Instrument Digital Interface) cables are a form of cable used specifically to transfer from electronic musical instrument along with gadgets of a similar nature. An example would be a MIDI keyboard. The type of musical data it transfers often determines the type of sound the device should create as opposed to an actual sound emitted by the device itself.
A Digital Audio Workstation (DAW) software on your computer would have a large number of virtual instruments which control the sound of the data coming from the cable. While MIDI cables are still commonly used, USB cables are now also compatible with many MIDI devices as well.
2. Optical Cables
Another type possibly coming into play when Audio Cabling for Your Home Music Studio. Optical cables (also known as Lightpipe cables) reduce the hassle of an increased number of cables. This is because they are able to carry several channels of audio through a single cable. Optical cables use a somewhat dated technology not compatible with audio interfaces, but rather, other studio devices.
This type of cable would be used particularly for mic preamp strips as well as multitrack recorders for instance.
The forms of digital signals compatible with this cable are:
-
- ADAT – Carrying 8 signal tracks at once; this would be at a sample rate of 48kHz. Alternatively, 4 tracks with a 96kHz sample rate. This would transfer the 8/4 preamp channels to an interface.
-
- S/PDIF – (alternatively, TOSlink) this form transfers 2 channels of audio at once. This would typically export mixes to an output like slightly lower-end studio monitors.
Especially if you’re setting up a much smaller home music studio, it is less likely that you’d make use of optical cables. More so, if you’re not actually recording any live vocals/sound, rather created purely digital mixes.
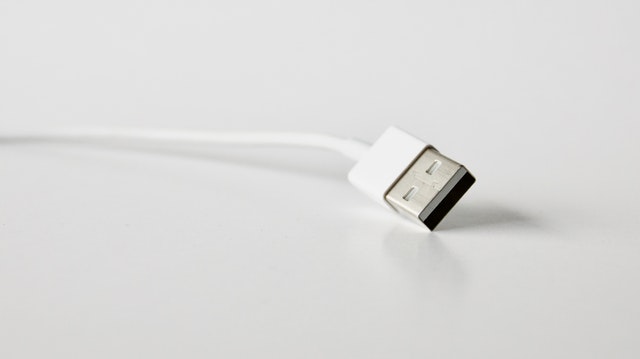
3. Interface Cables
 Interface cables would refer specifically to USB, Thunderbolt as well as Firewire as forms of cable connections. These are very common aspects in audio cabling for your home music studio. Audio interfaces are imperative to virtually every music studio environment. Pros make use of this cable religiously in studio, and so it cannot be skimped out on.
-
- USB – we’ve all interacted with some form of USB, most likely. USB cables would typically be used for more affordably ranged interfaces. Of the three mentioned categories of interface cables, USB transfers at the slowest rate. For this reason, it is ideal for smaller studio environments in which you don’t have too many interface connectivity requirements. USB cables do perform well in terms of low latency, under the correct usage limits.
-
- Firewire – this cable is often intended for use with Apple devices, and is typically used with higher-end interfaces. It offers a much faster transfer rate in comparison to USB.
-
- Thunderbolt – This cable offers the data fastest transfer rate of the three. Professionals primarily use this on much more modern high-end interfaces. It accommodates both PC and Mac usage, with extremely low latency. In studio environments with more going on in terms of channel inputs and outputs etc. this may the preferable option.
4. Ethernet
Ethernet cables are highly dynamic cables for usage in a music studio. Many professional studios make use of Ethernet cables for the fact that they offer a variety of usage in one cable. This form of cable is able to transfer both power and as well several channels of audio data in one cable.
Ethernet cables are able to carry up to 40 channels of digital audio data with virtually no latency at all.
About Analog Audio Cables
As mentioned previously, analog signals differ from digital in that they transfer electrical current as opposed to binary code data. Many questions end up surrounding the use of analog cables because they too vary in a number of ways. Let’s clarify the variances and uses of analog cables in a home music studio.
1. Balanced vs Unbalanced
When it comes to analog signal transmission, there are two different types that need to be considered. This would refer to balanced and unbalanced transmission. It is popularly argued that in order to simplify one’s life, try to use a balanced signal transmission if possible. However, read on understand the two.
Balanced Signals
Balanced audio cables consist of both the positive and negative versions of the signal that is passed through it. These subsequently nullify noise as they the two signals balance each other out.
Unbalanced Signals
Unbalanced audio cables, on the other hand, only carry a positive signal, unlike the balanced version. As a result, unbalanced cables are prone to allowing noise to interfere with the signal.
Which is the better one?
Truthfully speaking both forms of cable are perfectly usable when audio cabling for your home music studio. The bias toward the usage of balanced signals emanates mainly from an “ease-of-use” perspective. It is true that balanced cables offer a highly effective protection against surrounding electrical signals. But some of the most and high-end audio equipment out there will still require you to use unbalanced signal cables. This gives unbalanced signals some credibility as to why they’re still necessary for some situations.
Working around unbalanced signals
Unbalanced cables carry only the primary signal you are passing through it. The longer the cable you utilize, the more susceptible the cable is to noise. There are a number of ways to work around this when audio cabling for your home music studio, as using unbalanced cables will be inevitable at times.
-
- Use cables with adequate shielding – cables with sufficient shielding have the major benefit of preventing other surrounding electrical signals from being picked up by the cable. Surrounding signals would add to the noise traveling through the cable.
-
- Shorter cables are more ideal – The shorter the unbalanced cable is, the ambient electrical signals it is likely to pick up.
-
- Avoid a close proximity to power sources – Keep at least a meter or so in terms of spacing
-
- Gain Staging management – Gain staging in a DAW entails the control of levels in the flow of an audio signal in order to prevent the entrance of noise.
To learn more about audio noise and how to work around it, on How to Fix Audio crackling in Studio Monitors.
2. Audio Signal Levels
The aspect to consider regarding Analog Cables is the matter of audio signal levels. The two previously discussed audio cables (Unbalanced/Balances) transmit signals on three different levels. Namely
- Mic Level
- Instrument Level
- Line Level
When working with audio cabling for your home music studio, Line levels signals are considered the optimal level of signal transfer when it comes to transmission. For this reason, Instrumental and Mic Levels are often aligned to line level, prior to converging with the main signal flow.
-
- Mic Level – Mics have a balanced output. These are quieter signals that need to be boosted to line level using a preamplifier.
-
- Instrument Level – These are unbalanced signals emitted by bass guitars, electric guitars etc. These signals still do not quantify to those of a Line level. As a result, we need either direct boxes or amplifiers to boost them to the standard Line Level.
-
- Line Level – This is the optimal level of signal transmission. The two previously mentioned levels are raised to line level before joining the main flow of the signal. This is because Most professional equipment requires Line level, which is balanced.
3. Explaining Analog Connectors
Lastly, we take a look at connector types for Analog Audio Cables. There are three main connector types, namely
-
-
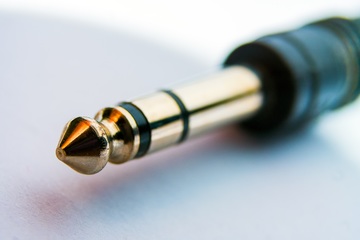
TRS Connector
TRS – These are balanced connectors and can be identified by their two plastic rings (or two conductor sleeves) and tip. These carry the positive and negative signals, as well as the ground signal respectively. These are generally found on mic cables.
-
-
-

TS Connector
TS – These carry only a singular, unbalanced positive signal. They are identified by a single conductor sleeve and tip. These would typically be used for Instrument cables.
-
-
- XLR – This type of connector is identified by its three pins. Specifically, these are for positive signals, negative signals, as well as the ground.
Overall, professionals use the cabling options we’ve covered in this article most studio environments. Hopefully, we’ve broken down the major components of Audio Cabling for Your Home Music Studio for your better understanding.
For more gear options, check this article on 15 Best Products for Bedroom Music Studios. Alternatively, have a look at the Music Studio DIY Recommended Gear page for more!