
 Most music producers want to consider their studios a haven for great sound. A great deal of investment often goes into setting up this kind of sonic oasis… But, what good is acquiring all that pricey studio gear if the listening/recording environment it goes into, isn’t all that great? Fact is, the acoustic treatment of a room can’t be ignored if you’d like to produce quality sound…
If there’s anything a newcomer would readily skimp out on, it is getting treatment up on their walls, despite the fact that only optimal music would be the outcome. For this reason, we’ll be getting a good understanding of why all of this is necessary in the first place, alongside an Easy 7 Steps to setting up Acoustic Treatment in your Home music studio.
If you’d like, you can jump to sections of this article that are more relevant to you:
- How Sound Travels in a Room from the Source
- Why is Acoustic Treatment Important
- How to Set Up Acoustic Treatment in your Home Music Studio (7 step guide).
The Basics: Room Acoustics
It is very common for newbies to become frugal on the topic of room acoustics. Why? Well, its importance is often very easily underestimated, or simply misunderstood. When it comes to home music studio recording, one of the main annoyances (and arguably your arch nemesis) is none other than the utterly dreaded Sound Reflections… *cue some type of dramatic music* This often has a truly adverse impact on the quality of your recordings. Before we look at how to install acoustic treatment into your music studio, let’s dig a little deeper into this, shall we?
1. How Sound Travels in a Room from the Source
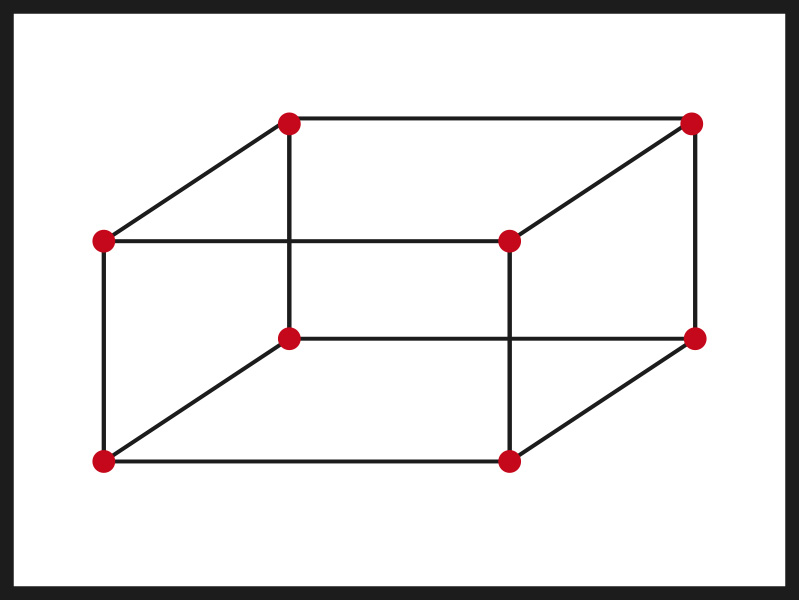
I think we all know that sound waves are not static at all by nature. Sound waves are emitted from a multitude of sources in a studio. Literally from your monitor speakers, your instruments, amplifiers as well as your vocals. Once these resonances leave the source, the waves travel across the room and bounce off of whatever flat surfaces they come into contact with. Walls, tables, ceilings… the works.

How Sound Travels in a Room
These reflected sound waves can be a major negative on two levels. Firstly, they can find their way back into the microphone/s you are using to record, and tamper with the quality of the recorded sound. And, secondly, reflected sound can be a true problem while monitoring during your mixing process. In this instance, we’d see excess sounds impacting the perception of the person who is monitoring. You should have a high level of accuracy while monitoring, and this can easily be tainted by uncontrolled reflections.
Overall the types of sounds that exist in a studio are, namely:
- Sound Reflections – As discussed, these are unwanted sounds that ricochet off of various surfaces. More specifically we have:
- Early Reflections – The first set of reflections that the ear/microphone captures. Often mistakenly perceived as part of the direct sound.
- Late Reflections – Sounds received much after the original sound and early reflections (i.e. reverb/echo).
- Direct Sound – This is the sound that travels directly from the source, and straight into the microphone, untainted.
Now, Direct Sound is what we want. And it the ONLY thing we want to record, and to hear while monitoring. So, how do we control the reflections then, if we have everything occurring at the same time?
2. Why is Acoustic Treatment Important?
…Which brings us to the whole reason why treating the acoustics of a studio is necessary. Acoustic Treatment, ultimately, is a form of sound absorption that manages the impact of excess, traveling sound. Overall, there are three major components involved in treating the acoustics of a room. Namely, these are:
-
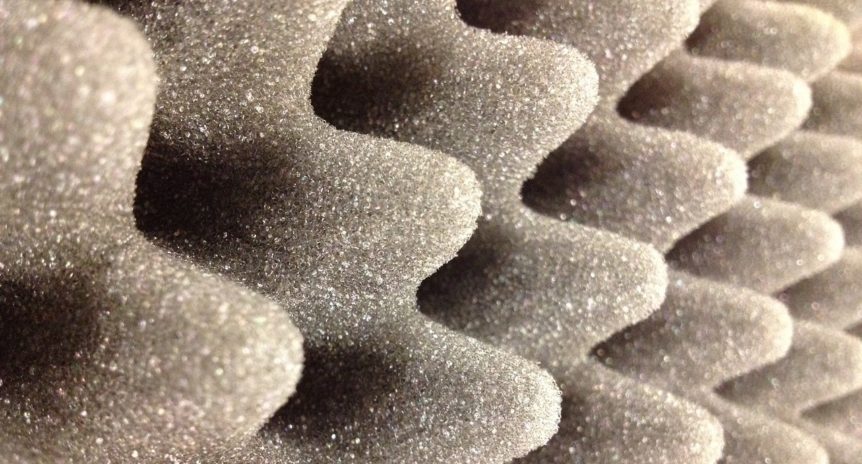
Acoustic Panels – These are meant to absorb mid to high range frequencies in a room. You can use either Foam Panels which are less expensive, and often applied using a spray adhesive to the walls. Or Fibreglass Panels, which are denser, and therefore absorb better. These are mounted on the walls using screws.

-
- Bass Traps – Intended for the absorption of lower range frequencies, often not captured by acoustic panels.
-
- Diffusers – For treating randomly scattered sound aberrations, such as echoes. Diffusers basically scatter remaining reflections, such that they don’t gather and get trapped in one area. This allows for a more natural, lively sound, as the room is not totally deadened by absorption panels.
It is very easy to fall into thinking that you could just correct your imperfect audio during your mixing process. Newbies make this mistake quite commonly. This is problematic for a number of reasons, including the fact that your sound quality is watered down, and also, it’s just a time waster. (Check out this article on 10 common newbie producer mistakes).
By treating your home music studio’s acoustics, you’re basically creating an environment in which your mixing process can be carried out with increased accuracy and clarity. It also becomes an optimal recording environment, as your microphones are able to record with impeccable, untainted clarity.
Now that we’ve established all the above, let’s move on the main reason we’re here right? How do we set up this ideal, recording/mixing studio environment?
How to Set Up Acoustic Treatment in Your Home Music Studio
We’ve covered the basics, and so hopefully we’re of the understanding that room acoustics is, in fact, an important aspect to consider. So here we have an easy 7 step guide on how to set up acoustic treatment for the optimal studio environment.
Many professional music studios have two separate environments for the production process, namely: a Control Room, as well as a Live Room. In this case, you’d have two separate treatment strategies. However, in this guide, we’re looking at treating a combined studio environment in which mixing and studio recording would happen in the same space. This is commonly the case in home music studios.
Step 1: Evaluate Your Empty Space
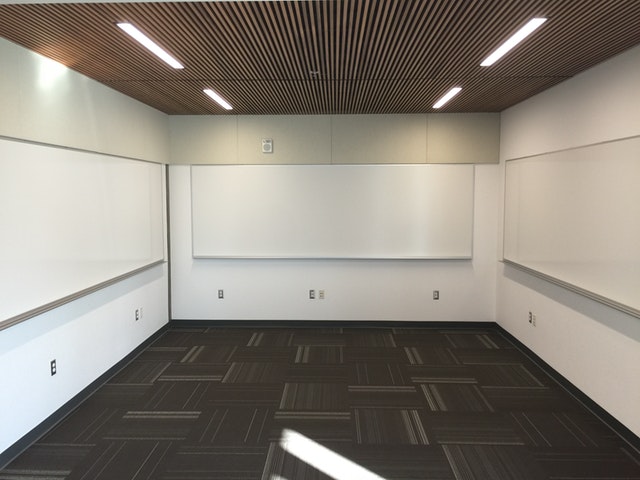
Evaluate Your Empty Studio Space
It is pretty tempting to want to just purchase all your treatment gear off the bat, and just figure it all after, right? Again, I think this is a really important principle: don’t correct issues after the fact. You want to really just take a moment to just have a look at the space you have dedicated to using as a studio.
Measure the Area
A painfully obvious observation to make is, naturally, how much absorption you need. Considering your wall widths and heights is a given. Naturally, in order to determine how many panels, diffusers etc. you may need to purchase.
Observe the Sound Characteristics of the Room
But… it isn’t entirely quite that simple. Another determining factor of how much absorption you’d need also depends on the type of reverb you get back in your room.
Overall, yes, this can be a little difficult to determine if you don’t have a solid reference point as far as what is good and bad sound in your room. This would be a matter of trial and error, as well as preference concerning the amount of reverb or deadness you would like. Generally though, as a definite principle, the more confined your space is, the more panels and treatment you need.
A good place to start would be to conduct a listening test. Either get two wooden planks to slam together, or simply perform a clapping test in the room in which you measure the following:
- If the sound you receive is on more of harsher, metallic note, this is the least ideal situation. It is more commonly the case in smaller, confined rooms. You’d need more acoustic panels in this case, in order to deaden the sound of the room.
- If the reverb is less harsh and less obvious in tonality, as would be the case in larger rooms with higher ceilings and intricate diffusion cavities, the less treatment you’d need. This would be very common for larger spaces such as cathedrals, which have been optimally designed for great acoustics.
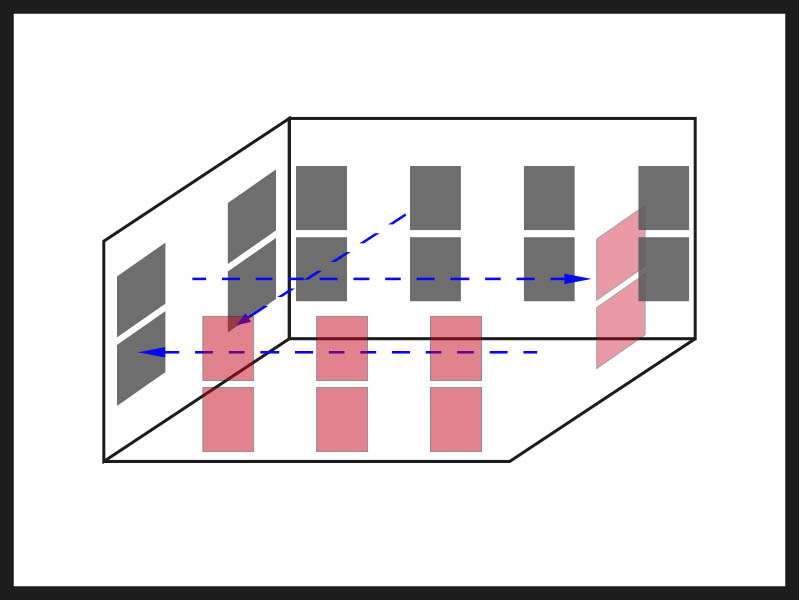
Step 2: Identify the Early Reflection Points of the Room
 When setting up your acoustic treatment for optimized perceptive mixing, you want to tackle the First Reflection Points (aka the Early Reflection Points) of the room. This primarily affects the listening/monitoring area of your studio, but also microphones when recording.
These are called first or early reflections because, of the dozens of reflected sounds that can travel in a room, these would be the first (after the direct sound emitted from the monitors) to reach the listener’s ears. First reflections are received within 20 milliseconds after the direct sound, meaning that they would be perceived as part of the direct sound. As a result, the tonal balance is altered, an inaccurate sound is heard while monitoring.
To combat this:
- Place your acoustic foam/fiberglass panels directly to walls on the left and right of the mixing station. You also have to place some panels on the ceiling directly above the mixing position.
- It is best to go thicker 4-inch fiberglass panels, screwed directly onto the walls.
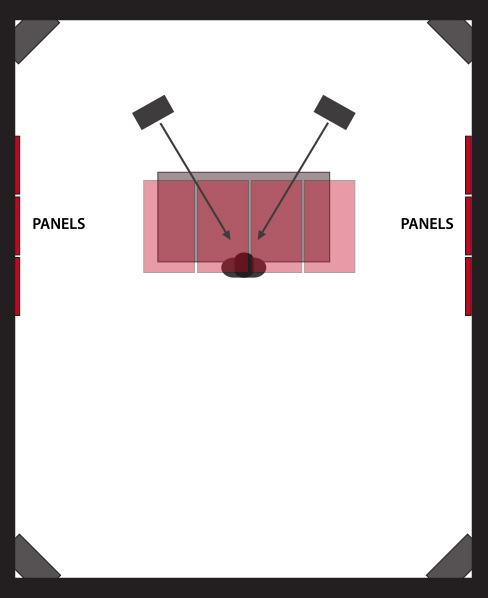
Step 3: Add Bass Traps – Treating the Trihedral Corners of the Room
Where to position your Bass Traps
The trihedral corners of a room are commonly understood to be one of the most important corners of the room to cover. To understand where these are in a room, look the diagram indicated.
Basically, this is where you want to position all of your Bass Traps for lower frequency absorption. The reason why these areas are so important to cover is that lower frequencies tend to wreak mayhem in a room. Even worse in smaller spaces. We’d see problems such as longer decay times for uneven frequencies, amongst many others.
Step 4: Cover the Walls
Interval Spacing of Panels
Soundwaves emitted in a room can easily travel back and forth between walls that are parallel to each other. They would typically perform this back and forth motion in more or less the same positions along the wall. Ultimately, this repeated motion can lead to the overall amplification of reflections, which we do not want.
Music producers combat this by covering as much of the wall area as possible using Acoustic Panels. These can be in the form of either Foam Panels or Fiberglass Panels.
If you are on a little bit more of a budget, covering your entire wall surface can be something of a costly exercise. A great way to work around this with fewer panels on hand, is to spread the panels along the wall in interval spaces. Basically leaving gaps between each, and on the parallel wall, doing the same.
A great example of acoustic foam panels would be the Auralex Acoustics Studiofoam on Amazon, alternatively, you could have a look at the RDE Fiberglass Sound Absorbing panel here.
Step 5: Cover the Corners (Dihedral Spaces)
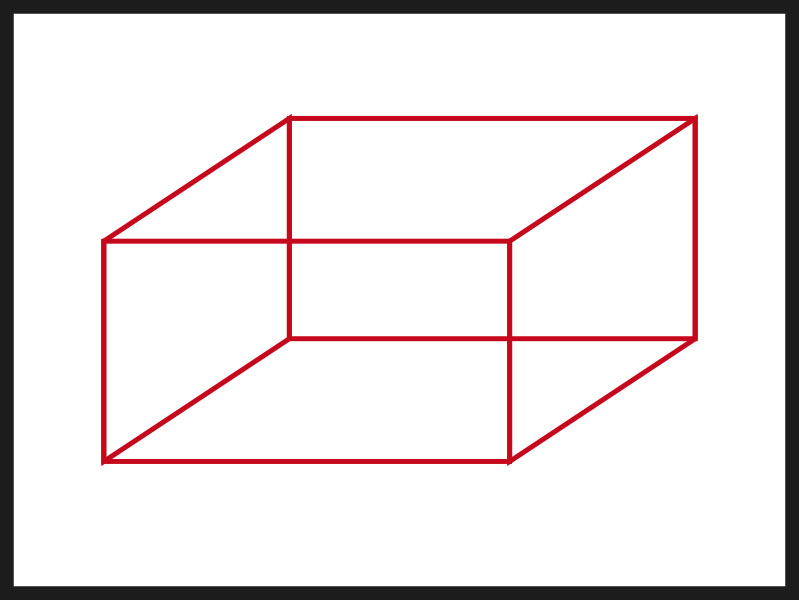
Dihedral Corners indicated in red.
With your remaining panels, cover the dihedrals corners of the room. These are basically the areas in which two walls meet each other, as indicated in the diagram. Acoustic foam would work best in this regard, and you don’t really need to overdo it with this step. Simply bend the panels over the corners where two walls meet.
Step 6: Diffusion
Diffusion area placement
It is generally agreed upon that diffusion, in music studios, is an element more effectively incorporated in larger sized studios. Not only that, but diffusion can be rather pricey. Which is why many home music producers choose to leave this aspect out of their workspaces altogether. Either this or they would opt for the DIY route.
However, if you have the extra buck to spend, then honestly, all the better if you’d like to go ahead and incorporate diffusion.
The widely accepted position to place diffusers in a room would be on the upper levels of the room. Either on the ceiling, or simply higher up on the walls.
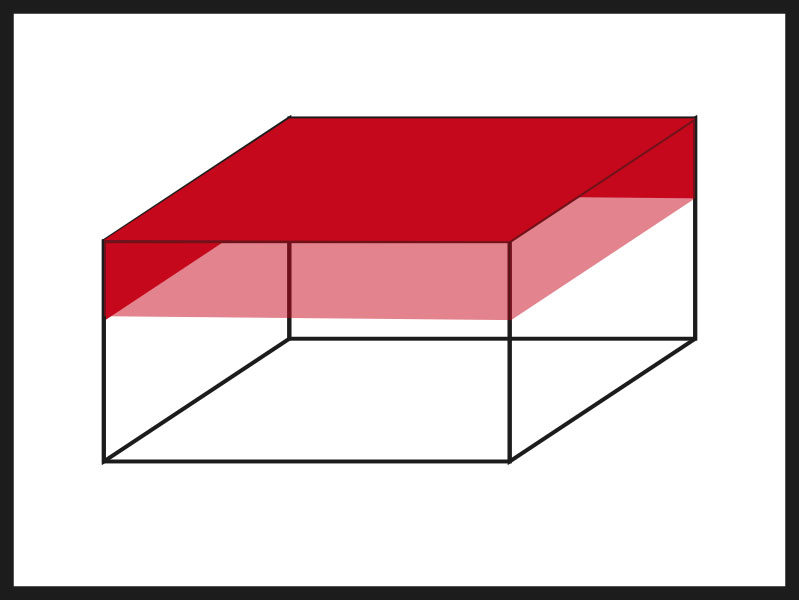
Step 7: Using Absorption to make your ceiling disappear
This is another additional technique you can use just to take things one step further. This is ideal for if you’re really looking to get the ultimate listening accuracy while mixing. It also has further advantages as far as deadening excess reflections during your studio recording process.
Your home recording studio should be relatively good to go at this point, should choose not to implement this step.
A combination of wood floors along with a highly absorptive ceiling would be the common arrangement in many professional recording studios. In Step 2, if discussed placing a section of acoustic panels just above your listening position for mixing. This is great for getting just enough to create a mixing area free of excess resonances.
But in this case, we’d want to use/create a giant broadband bass absorber, basically covering most, if not all of the ceiling.
What should I expect to hear from my studio, ultimately?
We’ve discussed how Acoustic Treatment for your home music studio is well worth the investment. Especially if a professional, industry worthy output is what you’re aiming for, this is definitely the way to go. After having considered and carried out these 7 steps on how to acoustically treat your home music studio, you should expect a number of invaluable improvements to the sonic experience of your room.
For example, a significantly enhanced depth and clarity to your studio recordings and playback, as well as the same effect on your mixing and monitoring process. You can expect untainted, crisp and clear recording sound from both vocals and instruments. Greater interpretive precision is also to be expected while monitoring.
By treating the first reflective points of the room, you will experience a tight, focused imaging of your soundstage. This would the case coupled with a good monitor speaker placement.
Ultimately implementing acoustic treatment in your home music studio is worthwhile and creates an environment of pure sonic bliss. The same would surely be the experience of the listeners of your music, by producing your work at its best.
Learn about the ideal acoustic treatment toold you need. Check out this article on Best Products for Studio Acoustic Treatment.