 So… you’re trying to setup studio monitors in your bedroom… or in some place really tiny?
Ideally, the best type of recording environment is one in which ample space available. However, quite understandably, this isn’t always possible if a large empty room is not readily at your disposal at home.
Studio monitors are a great set of equipment for getting the finer, true details of your recordings up to standard. Some really good questions to ask are not only where to position the monitors in your home music studio. Nor what the ideal setup is if you’re really limited with space. But also, what type of monitors would be ideal? Alongside a good acoustic treatment for your designated room (discussed in a separate article), a workable setup and professional sounding recordings in your small space are entirely possible with the following tips.
1. Establish Your Mixing/Listening Position
Where exactly is it best for you to sit? Although it may seem a minor aspect to consider, good sound has very much to do with not only the overall setup of your equipment, but also where you’d place your self in your setting. The cause of this is a major contributing factor to your perception of sound, known as “sound reflections”. Reflections, in short, refer to sound waves that travel from an original sound source and bounce off of various surfaces of a room (i.e walls, tables etc.). Reflective surfaces can create undesirable additions to music you’re wanting hear through the monitors, and as a result, can impact your judgment in refining the music.
Generally, in much more spacious professional recording studios, it is pretty common to find that monitors are placed along the longest wall of the room and fire down the shorter length of the room to your listening point. This placement has the advantage of setting further away the reflective sidewalls of the room. But this is, of course, given that the room is large enough.
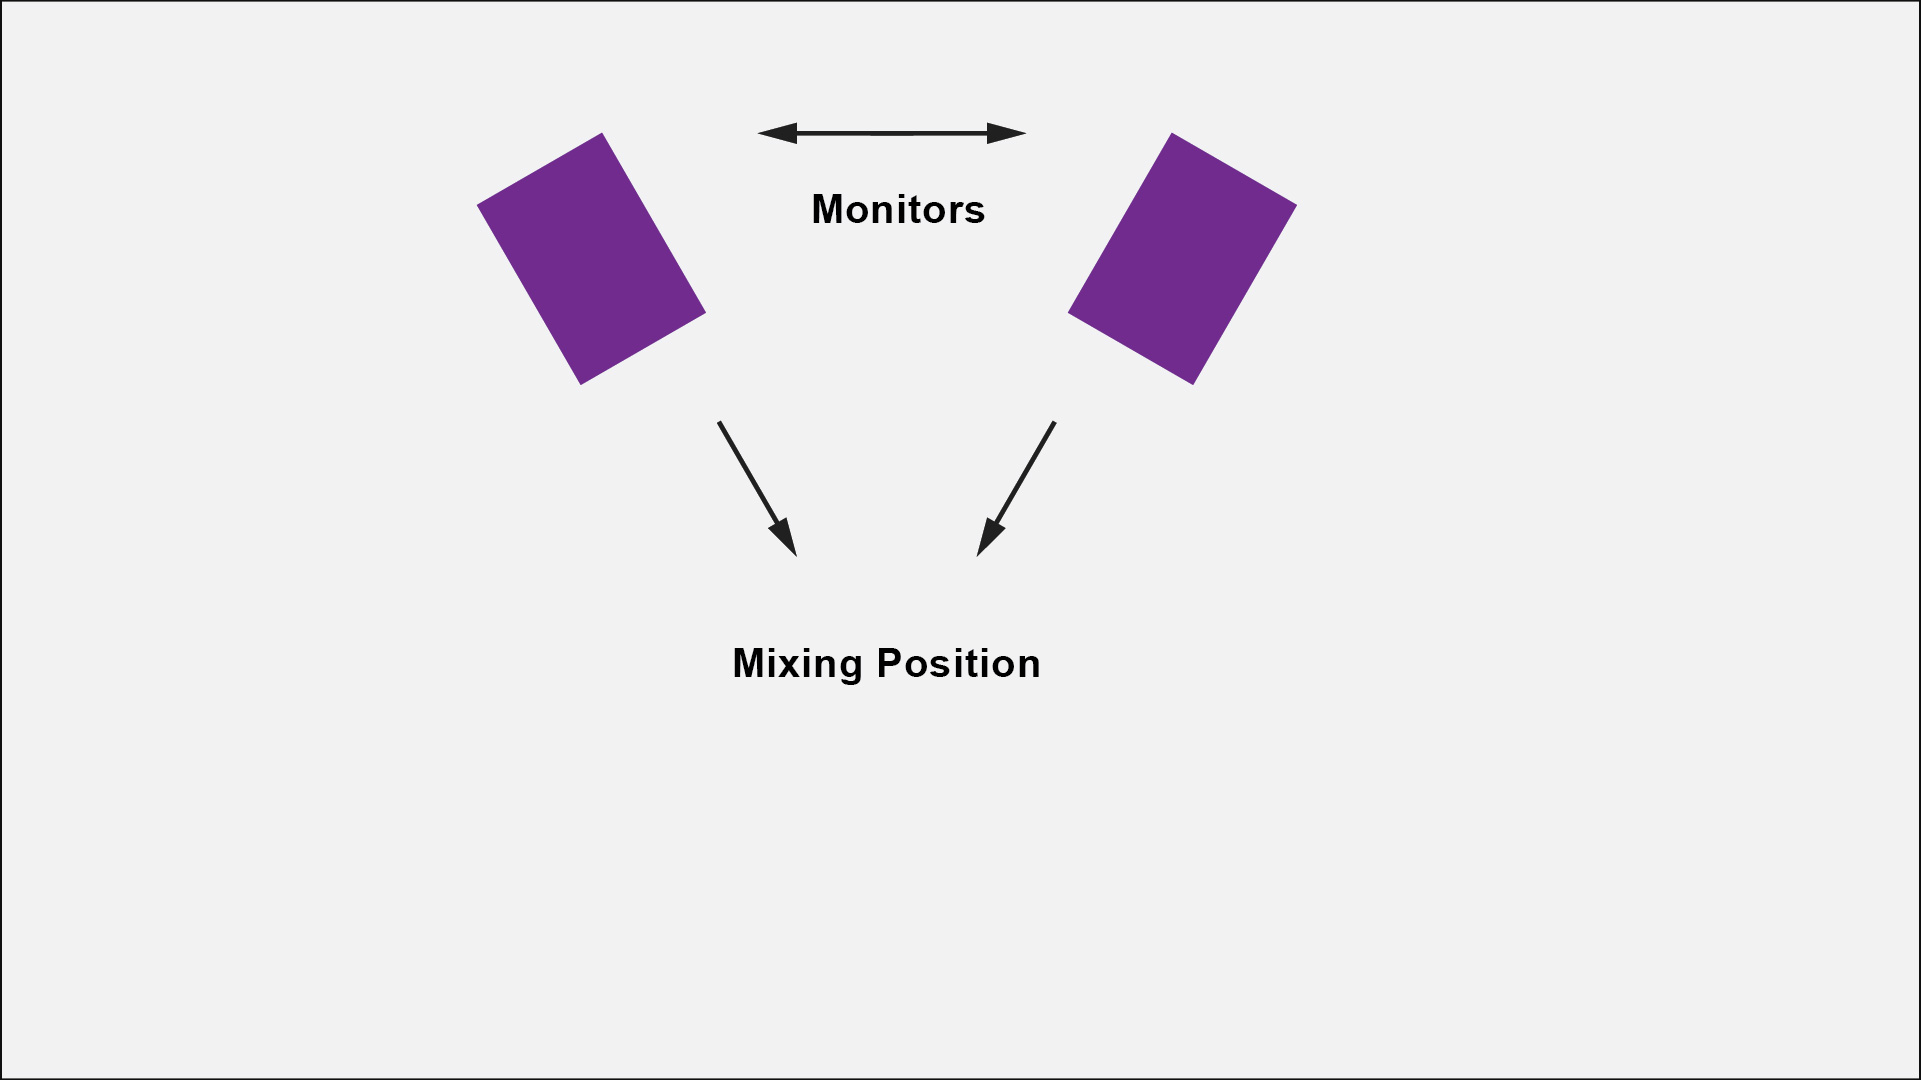
Monitor Setup in a Larger Room
In your case, however, with a more confined space to operate in, it is best to work things the other way around. You should rather place your monitors along the shorter wall of the room, sounding down the longer length of the space leading to your listening/mixing position.
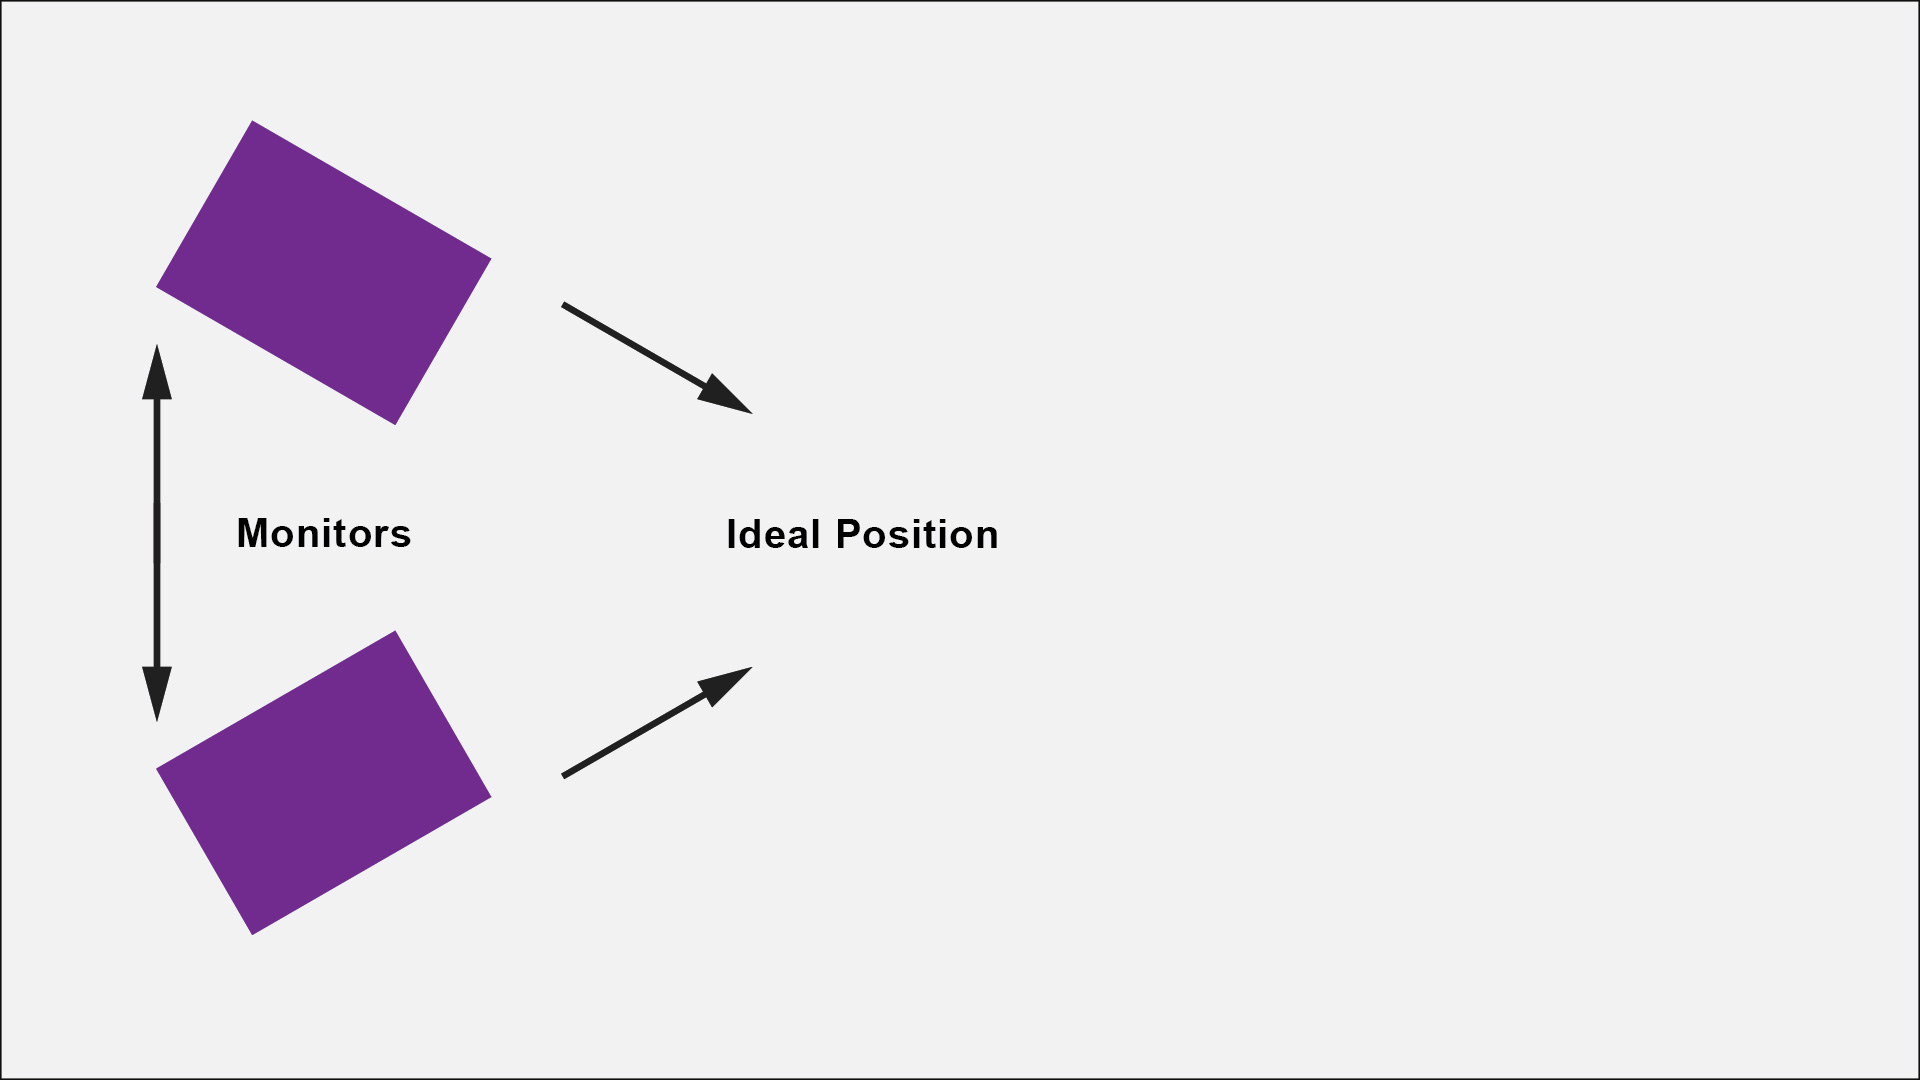
Ideal Monitor Position for Small Rooms
2. Placing Your Studio Monitors
The perfect listening/mixing setup is, in fact, a topic that is widely debated. However, a standard formula has been agreed upon by many of today’s music professionals.
Sound engineers accept that your head (listening point) should form an equilateral triangle in relation to your studio monitors. To do this, the two points where your monitors would be placed, should form a 60º angle from the position at which you, as the mixer, would sit. It is good to try varying the distances between you and the monitors (maintaining the 60º) until you reach the optimal result. However, at all costs, try to avoid getting to close to any walls of the room; the aim here being to avoid the adverse effects to your production which can be caused by sound reflections.
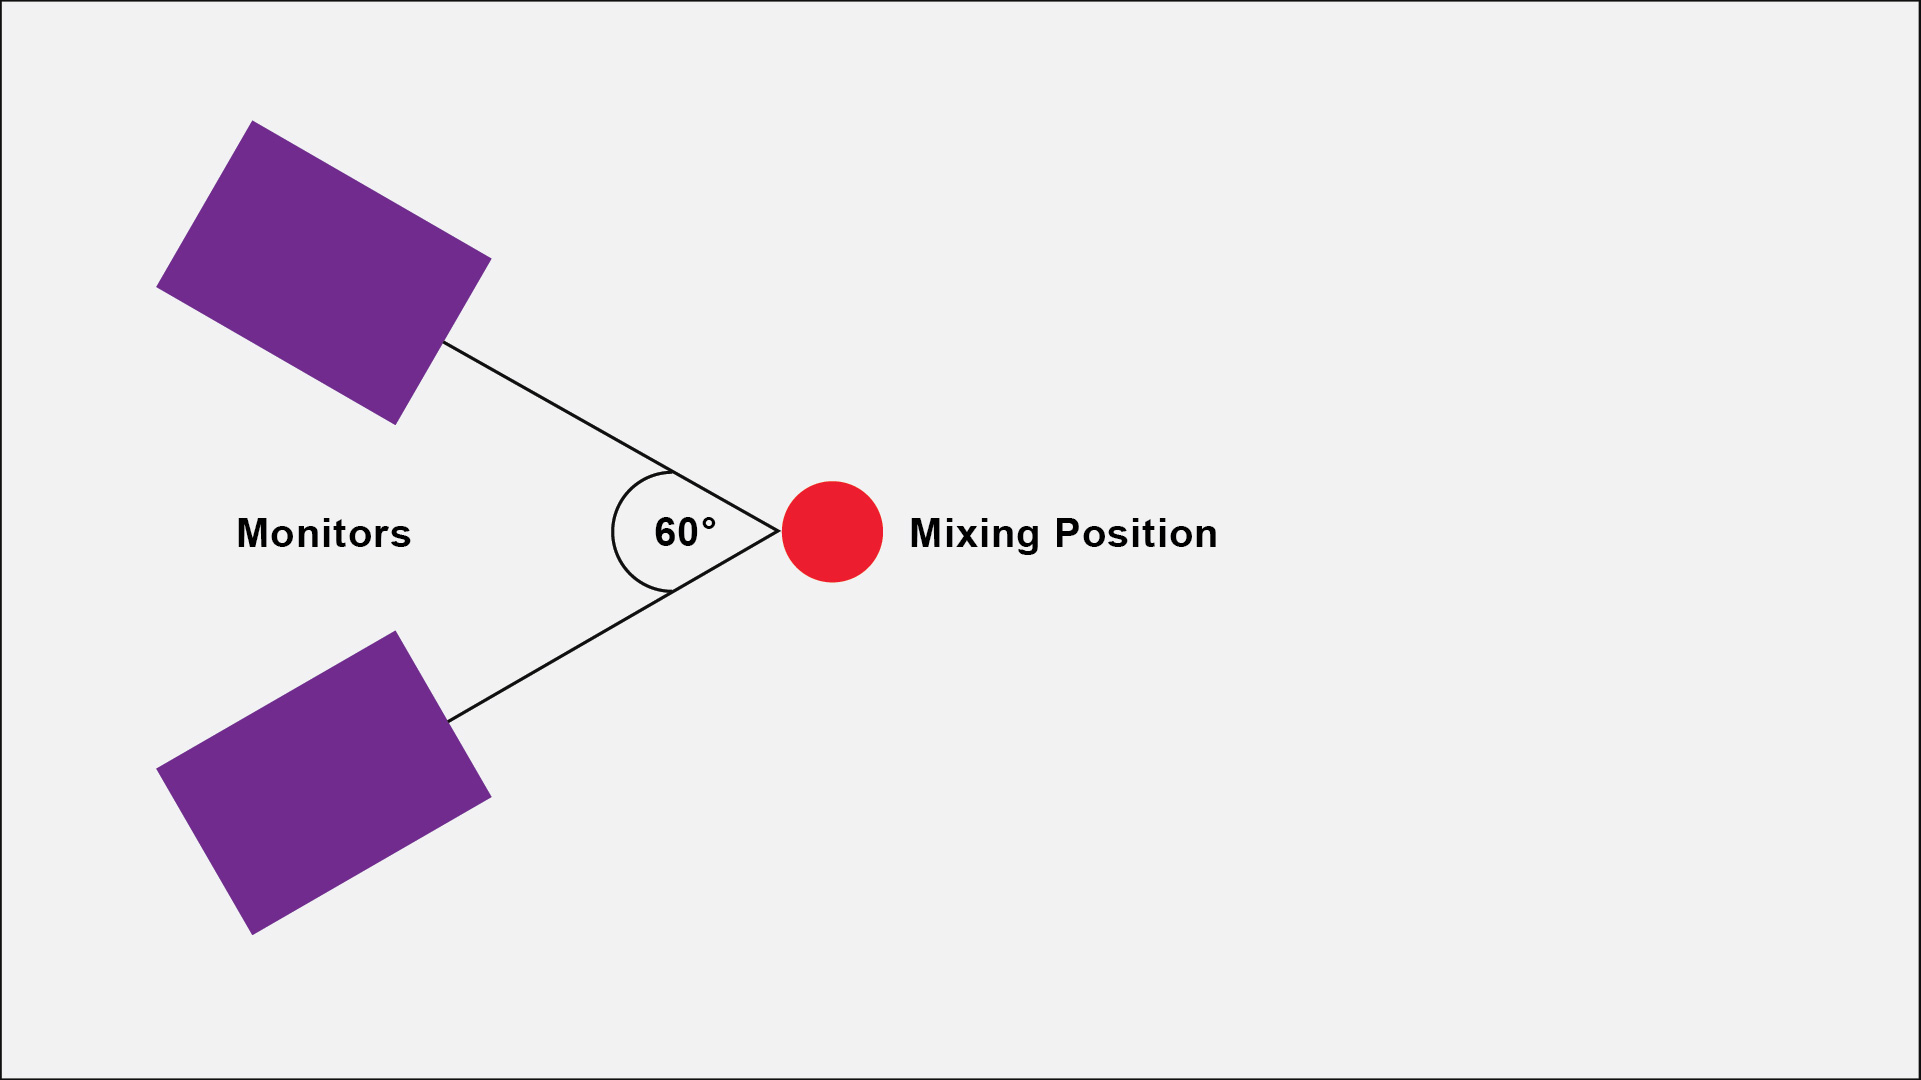
60° Monitor Placement
Next, angle the monitors directly towards your head, rather than straight-ahead. Also be sure not to place the monitors directly against the corners or walls of the room.
3. Creating Symmetry and Balance
Another great tip involves creating symmetry in your audio setup. In other words, ensure that there is an equal spacing between the left and right sides of the equilateral triangle arrangement; more specifically the monitors.
For example, if the studio monitor on the left is 2 meters away from the wall on the left, then there should also be a 2-meter distance between the monitor and wall on the right side. Symmetry in your studio setup is to allows for balanced perception of sound in relation to the possible reflections caused by the walls on either side.
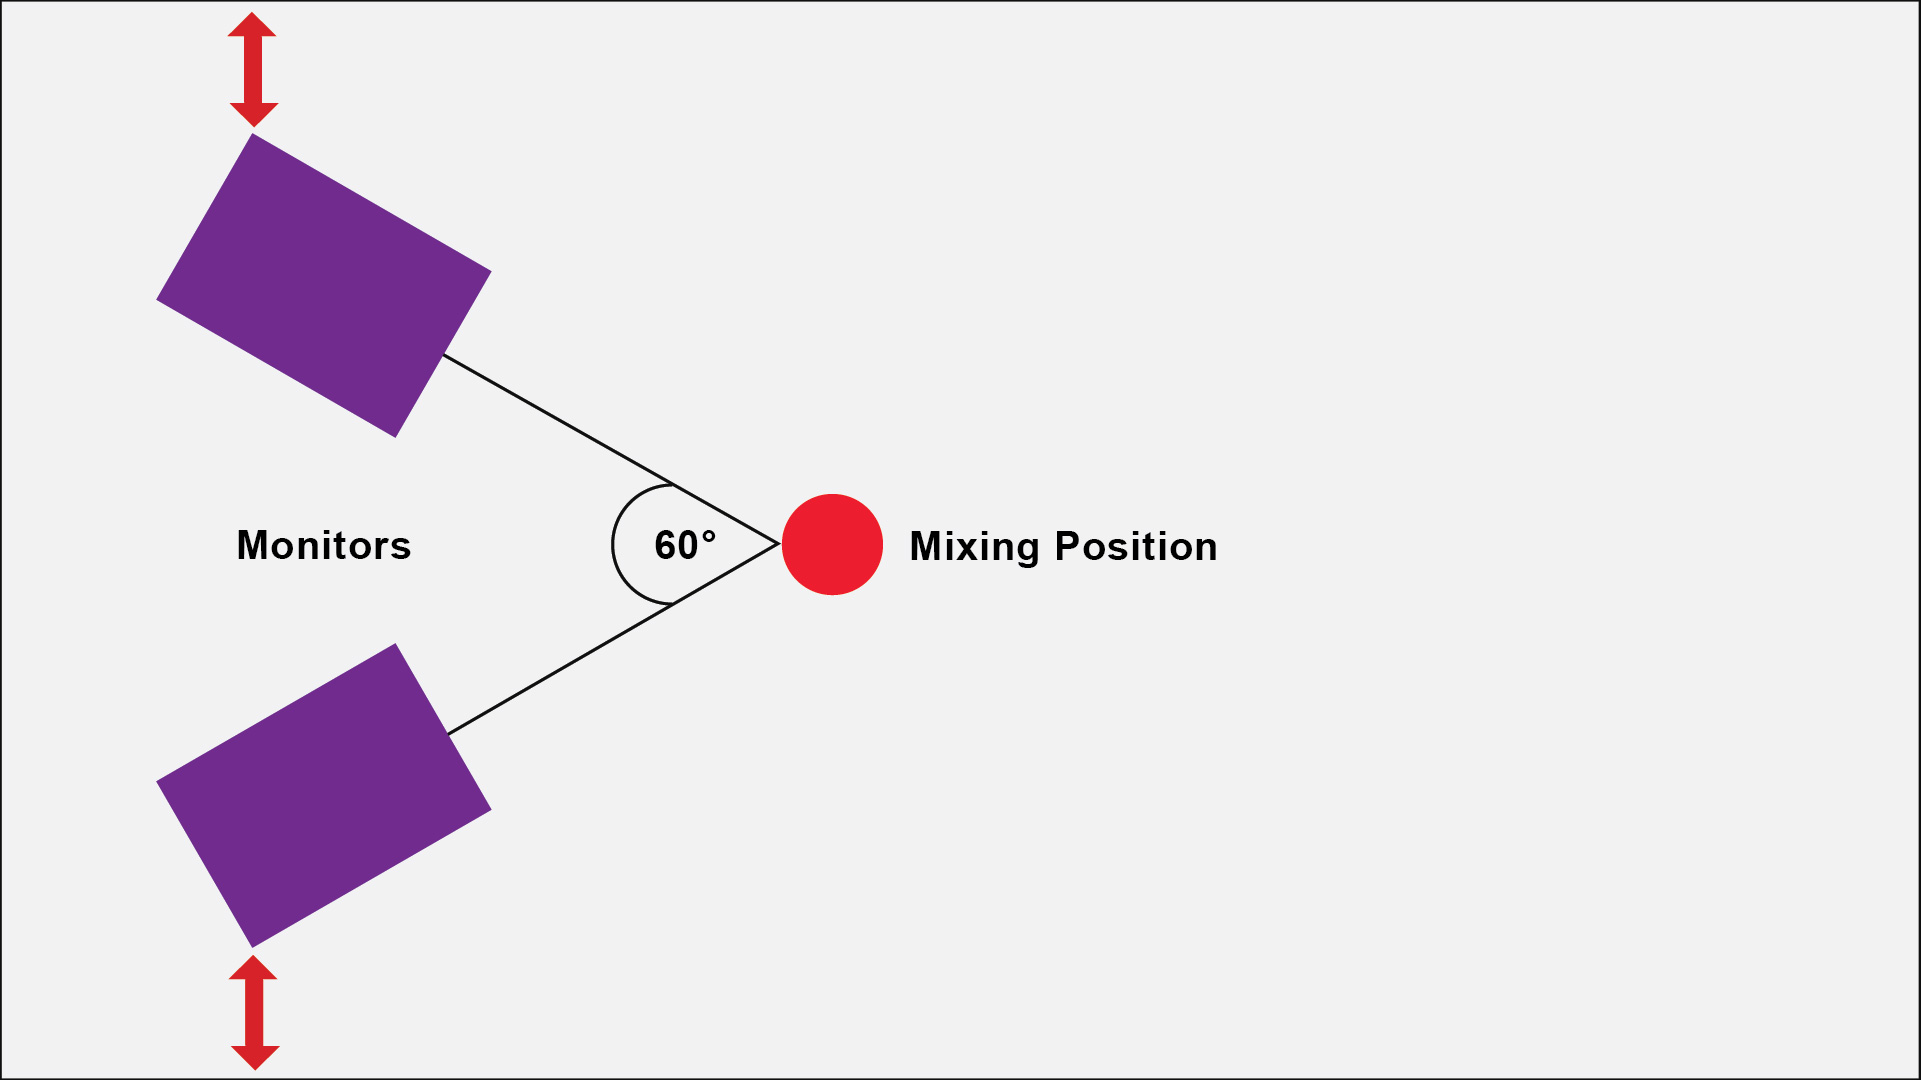
Ensure Studio Monitors are Equidistant from the Walls
4. Isolate Your Studio Monitors
Your studio monitors should be isolated from surrounding surfaces. This refers back to the idea of avoiding the creation of unwanted reflections as far as possible. When creating a music studio in your bedroom, the temptation can be to place the monitors on your mixing desk. The major disadvantage in doing this is that a table in itself is a reflective surface. This may obscure your frequency response perception.
Monitor Stands
The best way to combat this is to rather make use of Monitor Stands. These isolate your studio monitors/speakers in the best way, raising them off the ground altogether.
Desktop Pads
However, with a space a little too limited a great and more economical alternative would include Desktop Pads. Use Desktop Pads in order to raise your monitors slightly off the table and tilt them to suit you.
Desktop Stands
If your seating position is a little more elevated, your want to opt for desktop stands. These often come with custom tilting as well and isolate your monitors almost as ideally as monitor stands.
5. Best studio monitors for a really small room setup?
This aspect as it is really important, especially if your recording studio space is really confined. The right kind of acoustic treatment, along with bass traps, should lessen the impact of reflection in your music studio. (Check out this article on alternative acoustics treatments, as an aside).
Larger monitors in a very small room create the risk of too much resonance and bass. This could result in increased unwanted reflections in the room and possibly impairing your mixing decision. Similarly, mixing with the volume too high can have this effect in a small studio. Basically, it is important that whatever your choice of monitors, monitor with the volume low or a general speaking level.
So what kinds of Studio Monitors to go for?
For your small studio setup at home, try to stick to monitors with a 5” to 8” woofer element.
To be more particular, in really tiny spaces, such as a bedroom keep it between 5” to 6”. A great example of these would be these JBL 5″ Monitors on Amazon. You could also take a look at the KRK Rokit 5 Monitors for comparison on Amazon.
And for medium to slightly larger room in your home setup, you can go for around 7” to 8”. If you consider some acoustic treatment, these sizes may still work in a smaller room. A great recommendation in this case would be these JBL 8″ Monitors. The three monitors suggested here are great for a start up setup.
So there you have it! Your home music studio might be imperfectly perfect in size, sure. And it might be in your very own bedroom… Or the corner of your living room… But these are some great aspects to take into consideration for creating your own masterful music sets!
